How to rotate napalm BO6 pc? The Napalm Strike is one of the most powerful scorestreaks in Call of Duty: Black Ops 6 (BO6), capable of turning the tide of battle in an instant. It calls in an airstrike that drops napalm bombs along a selected path, creating a fiery inferno that can eliminate enemies and control key areas. Players who master its deployment can significantly influence the outcome of a match.
Understanding how to properly use and rotate the Napalm Strike is crucial for maximizing its effectiveness. A well-placed strike can cut off enemy movement, secure objectives, and force opponents into unfavorable positions. However, misusing it can lead to wasted opportunities and minimal impact on the game.
Table of Contents
Understanding the Basics of Napalm Strike
Before diving into advanced tactics, it’s important to grasp how the Napalm Strike functions. Once activated, a military aircraft flies over the battlefield, dropping a series of napalm bombs along a designated path. These bombs ignite upon impact, creating a fiery wall that inflicts continuous damage over time.
The Napalm Strike is most effective in objective-based game modes like Domination and Hardpoint. By cutting off entry points or covering an enemy stronghold, you can control movement and limit the enemy’s ability to push forward. This makes it an excellent tool for area denial.
Additionally, the fire left by the napalm persists for a short duration, acting as a lingering hazard for any player who tries to cross it. Learning where and when to deploy it is key to maximizing its strategic value in combat.
Activating the Napalm Strike in BO6
To call in a Napalm Strike, you must first earn enough scorestreak points through actions like eliminating enemies, capturing objectives, and assisting teammates. Unlike killstreaks, scorestreaks reward all types of contributions, encouraging team-oriented play.
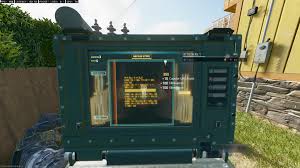
Once you’ve accumulated enough points, open your scorestreak menu and select the Napalm Strike. A targeting overlay will appear, allowing you to place the strike anywhere on the battlefield. This is your opportunity to choose the most effective location to drop the napalm bombs.
Timing is crucial when activating the Napalm Strike. Deploying it during enemy pushes or while securing objectives can maximize its effectiveness. Avoid calling it in when enemies are spread out, as it works best in confined areas with heavy activity.
Rotating the Napalm Strike for Maximum Effectiveness
Rotating the Napalm Strike determines the direction in which the bombs are dropped. Proper rotation allows you to align the strike with enemy movement, increasing the chances of eliminating multiple opponents.
To rotate the Napalm Strike on PC, follow these steps:
- Activate the Napalm Strike – Open the scorestreak menu and select the Napalm Strike.
- Hold the Left Mouse Button – Click and hold to bring up the targeting overlay.
- Adjust the Angle – Move the mouse while holding the button to rotate the strike’s path.
- Release to Deploy – Once you have the ideal direction, release the button to confirm.
Mastering the rotation feature ensures that your Napalm Strike covers the most critical areas of the map. Poorly aligned strikes may miss enemies or fail to block key routes, reducing their overall impact.
Best Map Strategies for Napalm Strike
The effectiveness of a Napalm Strike depends largely on the map you are playing. Some maps have narrow corridors and chokepoints, making them perfect for napalm coverage, while others have open spaces that require more strategic placement.
On smaller maps, deploy the Napalm Strike along high-traffic lanes where enemies frequently pass. This can cause massive damage and force opponents to reroute, giving your team a tactical advantage.
For larger maps, focus on objectives or key defensive positions. A well-placed Napalm Strike can prevent enemies from capturing zones, allowing your team to maintain control. Recognizing these strategic points will help you use the scorestreak to its full potential.
Common Mistakes to Avoid When Using Napalm Strike
One of the biggest mistakes players make is misplacing their Napalm Strike. Deploying it in an area with little to no enemy activity results in wasted potential. Always aim for high-traffic zones where enemies are likely to pass through.
Another common error is failing to rotate the strike properly. If the bombs are dropped in the wrong direction, they might miss enemy formations, reducing their effectiveness. Take a moment to rotate the strike for optimal coverage before deploying it.
Lastly, many players forget to communicate with their team when using scorestreaks. Calling in a Napalm Strike while a teammate is using a similar area-denial streak can lead to overlapping effects, wasting valuable resources. Coordination ensures that each streak contributes to the overall team strategy.
Advanced Strategies for Napalm Strike Success
Once you have mastered the basics, you can begin using advanced tactics to maximize your Napalm Strike. One effective strategy is choke point control, where you deploy the strike at key map bottlenecks to force enemies into unfavorable engagements.
Another strategy is objective denial, where you place the napalm over an enemy-held objective to prevent them from capturing or contesting it. This is particularly useful in Domination or Hardpoint, where objective control is critical.
A third approach is layered area denial, where you combine the Napalm Strike with other scorestreaks like the Artillery Strike or Gas Grenades to create a deadly zone that limits enemy movement for extended periods.
Combining Napalm Strike with Other Scorestreaks
To maximize the impact of your Napalm Strike, consider pairing it with other complementary scorestreaks. For example, using a UAV before calling in a Napalm Strike helps identify enemy locations, ensuring precise placement.
The Air Patrol scorestreak can be useful for clearing enemy air support before deploying your strike, preventing counterplay from the opposing team. This ensures that your Napalm Strike reaches its full potential without being disrupted.
For a highly effective combo, follow up a Napalm Strike with a Sentry Gun or Attack Helicopter. As enemies try to avoid the flames, they become vulnerable to these automated defenses, leading to additional eliminations.
Frequently Asked Questions
How do I activate the Napalm Strike in BO6?
To activate the Napalm Strike, earn enough scorestreak points and select it from the scorestreak menu during a match.
How do I rotate the Napalm Strike on PC?
Hold the left mouse button while the targeting overlay is active and move the mouse to rotate the direction of the strike.
What are the best maps for using the Napalm Strike?
The best maps for using the Napalm Strike are those with narrow choke points and high enemy traffic, such as Nuketown and Hijacked.
Can the Napalm Strike be countered?
Yes, enemies can use perks like Flak Jacket to reduce damage from the Napalm Strike, and they can avoid the affected area.
How can I improve my Napalm Strike placement?
Practice map awareness, anticipate enemy movements, and coordinate with your team to improve your Napalm Strike placement.
What other scorestreaks work well with the Napalm Strike?
Scorestreaks like the UAV and Counter-UAV can help you locate enemies and maximize the effectiveness of your Napalm Strike.
Conclusion
Becoming proficient with the Napalm Strike requires practice, map knowledge, and strategic thinking. Learning when and where to deploy it can significantly impact the outcome of a match, giving your team the upper hand.
Understanding how to rotate the strike properly ensures that the napalm covers the most effective areas. Avoiding common mistakes like poor placement, incorrect rotation, and lack of coordination will further improve your success rate.